Swate Walk-through
last updated at 2024-04-24DataPLANT provides the tool Swate to support you in data annotation. It is both integrated into ARCitect and available as a browser version. In this walk-through, we guide you through annotating data using Swate with a show-case example.
- 💡 Consider reading about Swate
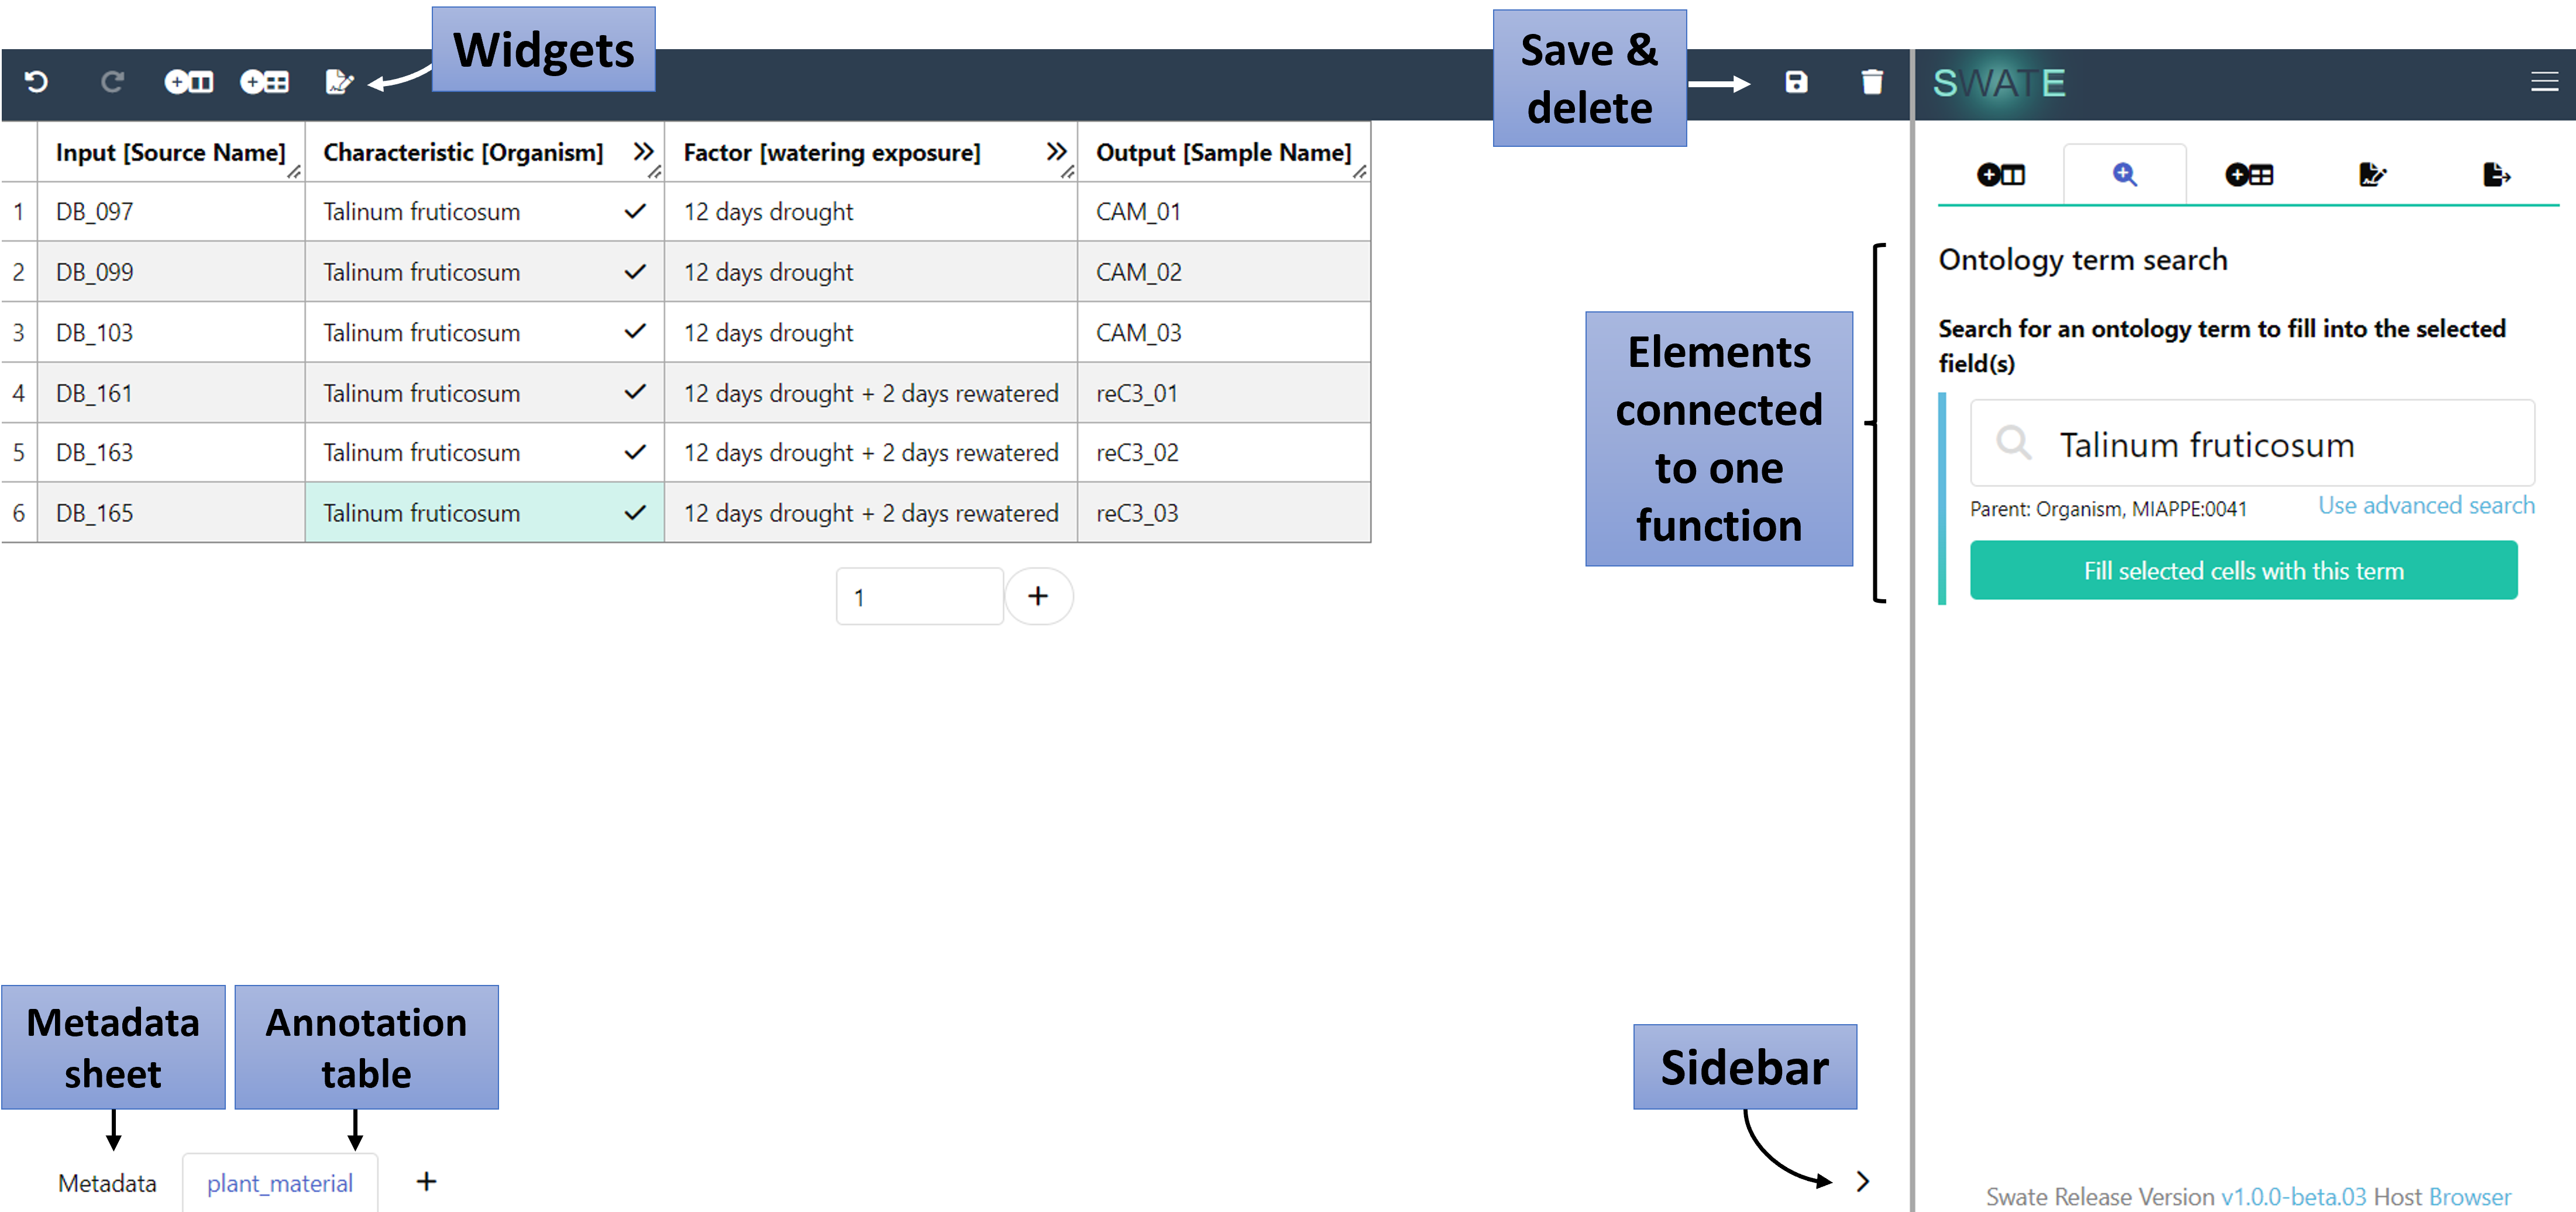
Create and/or open an annotation table as described in the Swate Quickstart

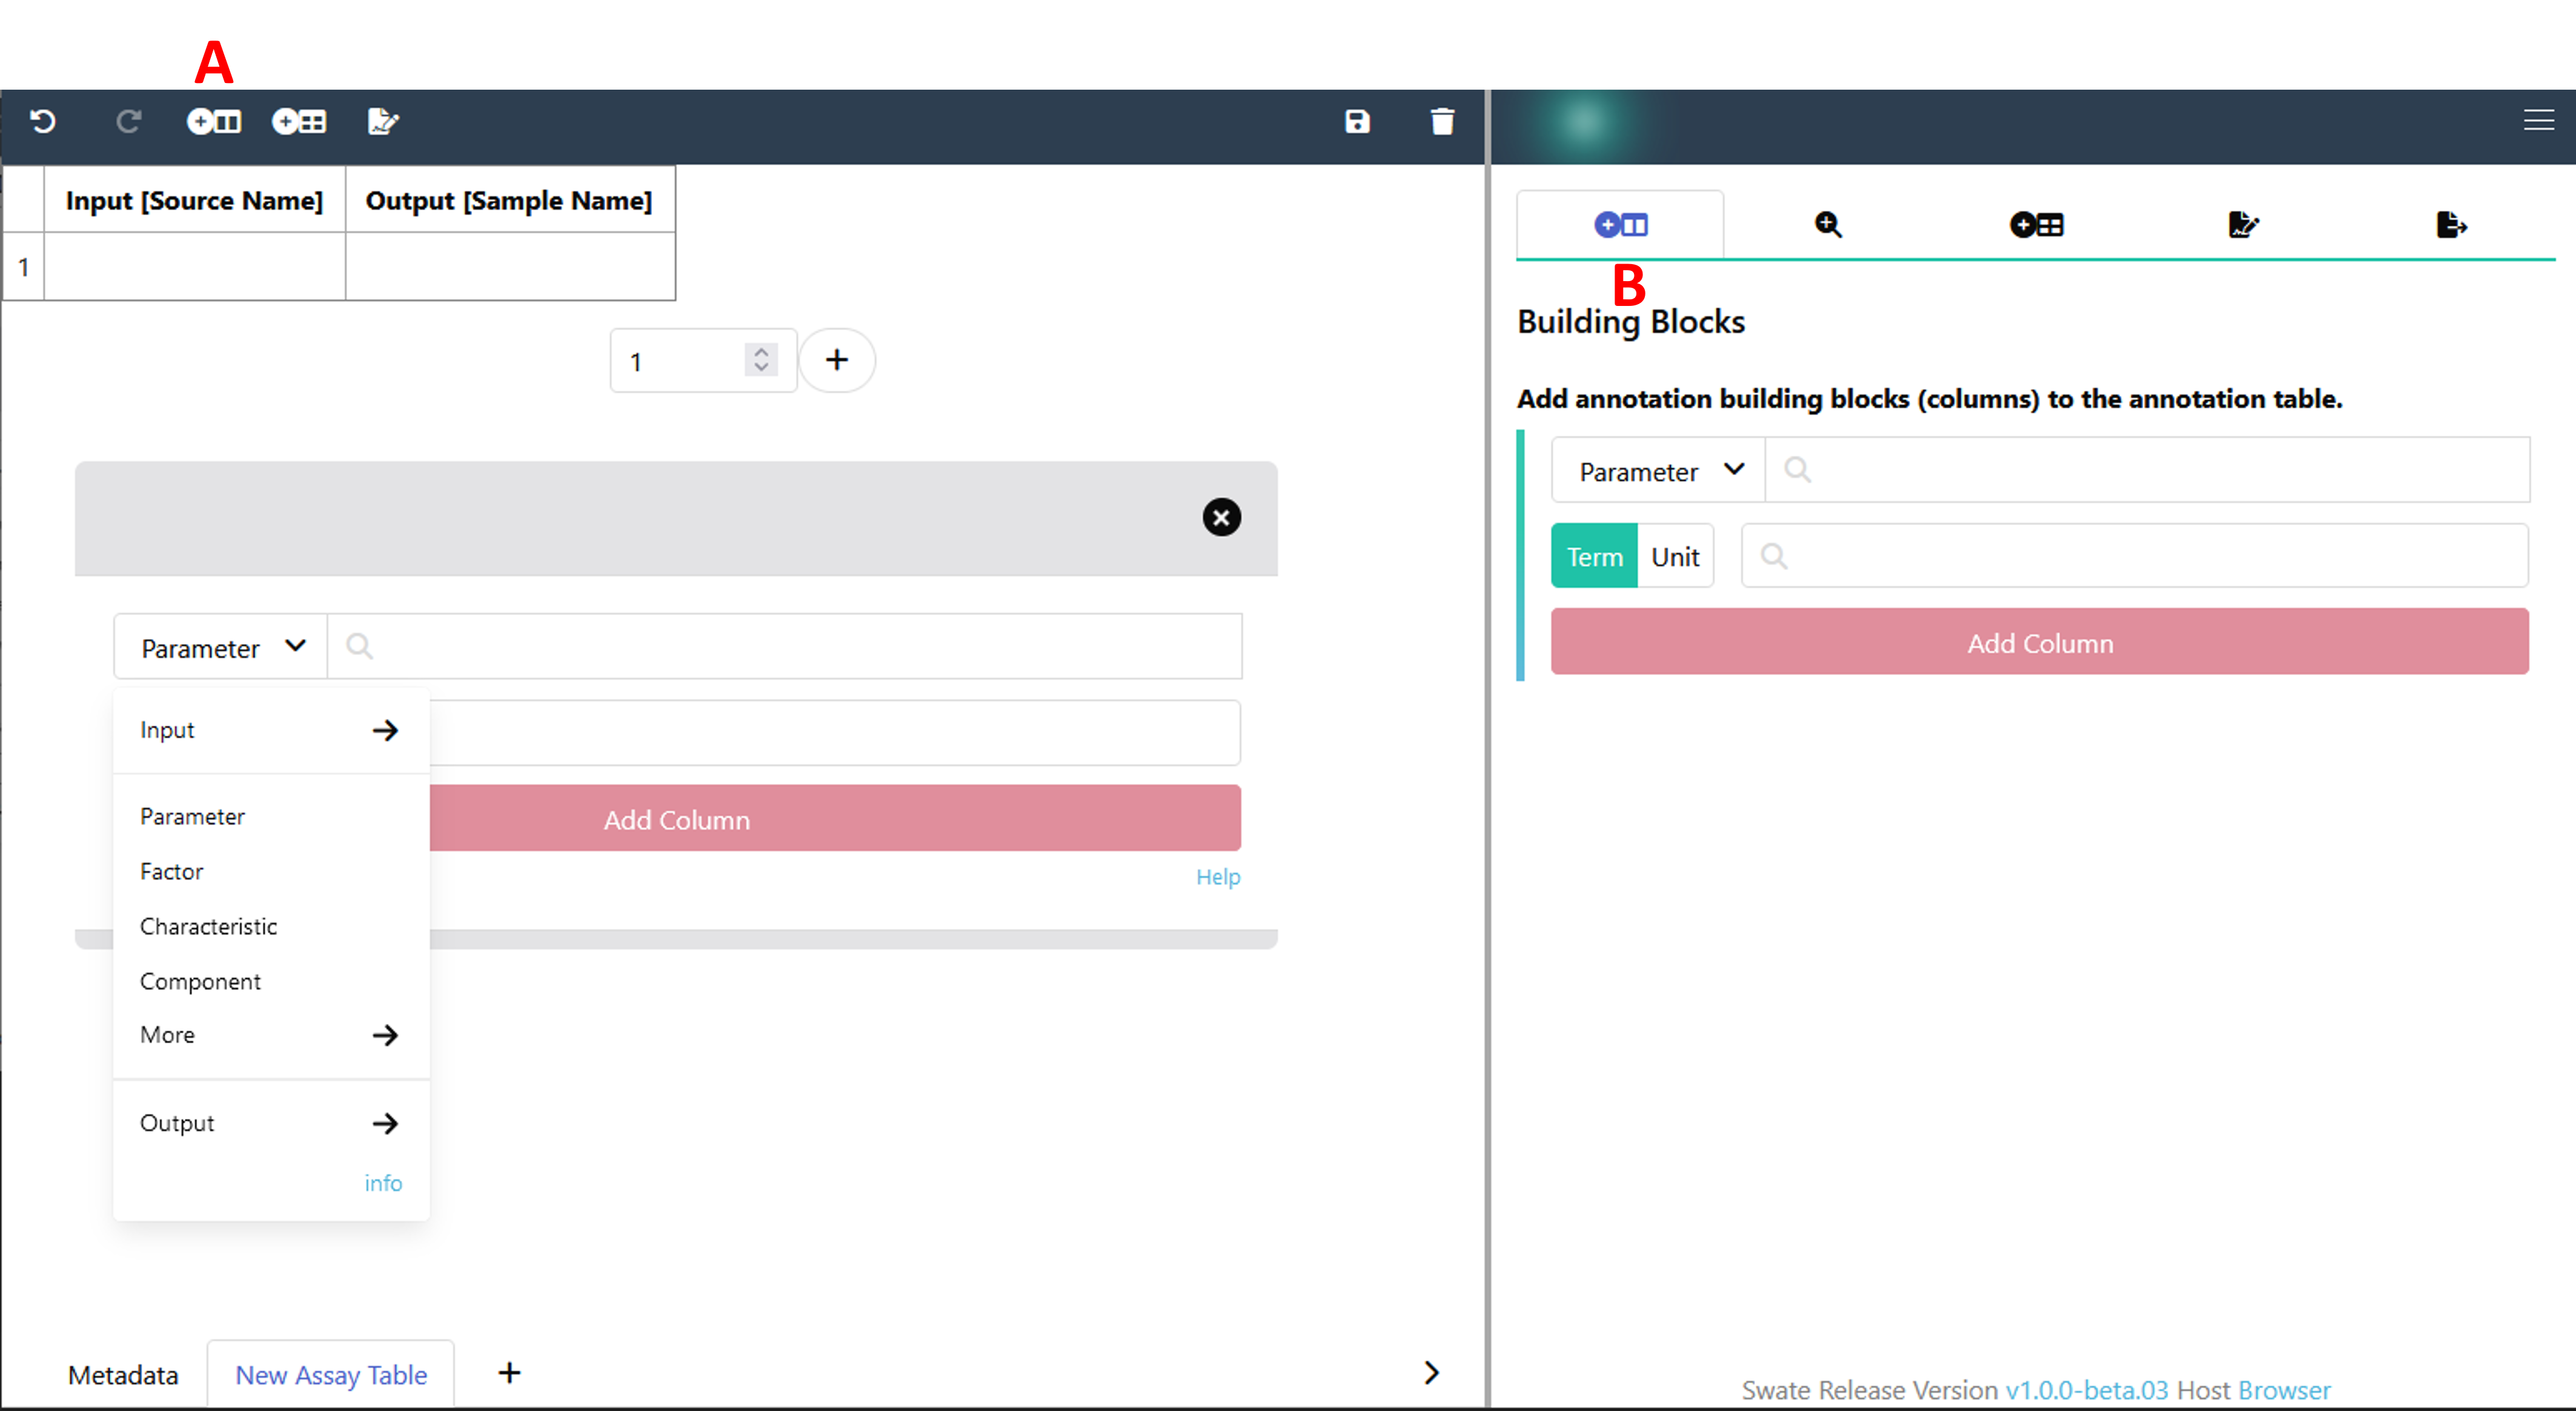
Each annotation should start with an Input and end with an Output column. To add and specify your Input building block, click either the "Add Building Block" widget on the top (A) or use the "Building Blocks" function in the sidebar (B). Select Input from the drop-down menu instead of Parameter and select Source Name as input type. Then click Add column. Add Output [Sample Name] analogously.

💡 Only one Input, one Output and one of each Protocol columns can be added per table.
Now, let's add a descriptive building block.
- Select Component from the drop-down menu.
- Search for
instrument modelin the search bar. This search looks for suitable terms in our ontology database. - Select the term with the id
MS:1000031and, - Click Add column.
💡 This adds three columns to your table, one visible and two hidden. The hidden columns contain the ontology references. You can view the hidden columns by clicking the two arrows (>>) in the first column.
- In the "Building Blocks" tab, re-select Parameter, search for
sample volumeand select the term with idMS:1000005. - Activate the "Unit" box and search for
microliterin the adjacent search bar. - Select
UO:0000101. - Click Add column.
💡 This adds four columns to your table, one visible and three hidden. When filling any cell below
Parameter [sample volume]you can now see the numbers being complemented with the chosen unit, e.g.10.00 microliter.
At this point, your table should look similar to this:

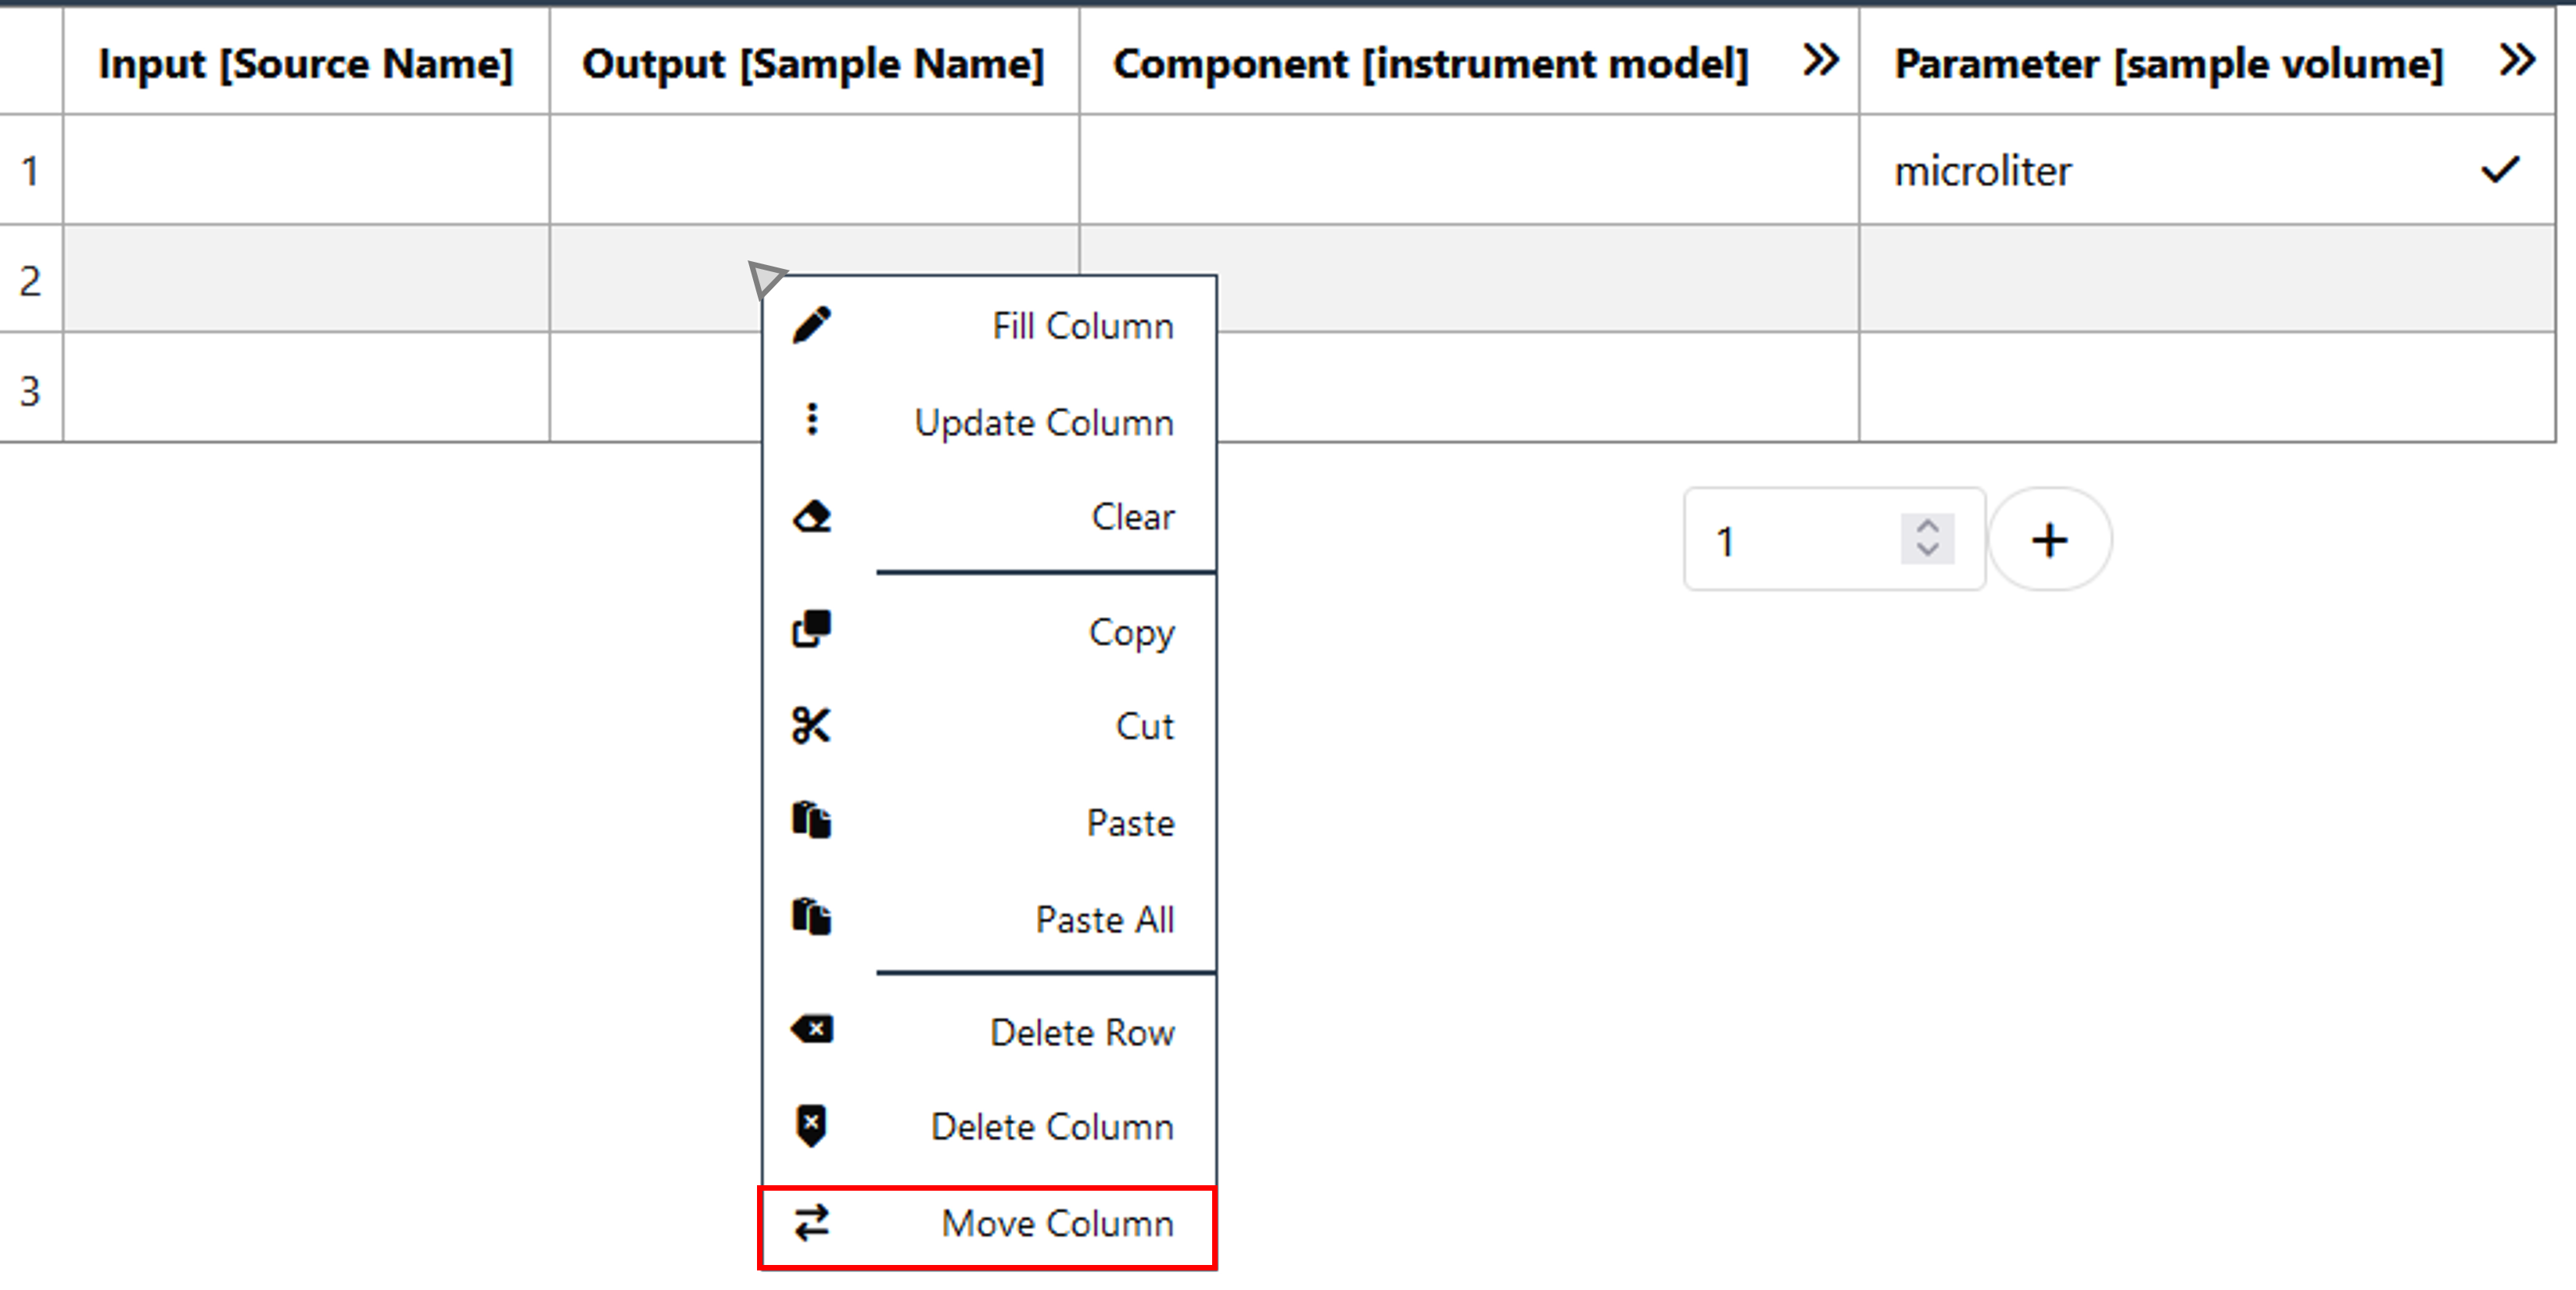
We now want to move the Output column to the end of your table. For this, right-click into any cell (except the header) of the column that you want to move. Now you can click "Move Column" and select the position that the column should be moved to (in this case: 3). If your table does not contain empty cells yet, you can add any number of rows with the plus symbol. Right-clicking into cells also gives the option of deleting a column or row.
Use the "Add Template" widget on the top or navigate to "Templates" in the sidebar and click Browse database.
Search for and select
Proteomics MassSpec assay.- You will see a preview of all building blocks which are part of this template.
Click Add template to add all building blocks from the template to your table, which do not exist yet.
If there are any building blocks which do not fit your experiment you can delete the columns as described above.
Go ahead, adjust the building blocks you want to use to describe your experiment as you see fit. Insert values for Input and Output and fill the cells of your Parameter, Characteristic or Component columns using the ontology term search. You can activate the ontology term search directly in the cells of your table with the magnifying glass symbol or you can use the "Ontology term search" in the side bar. Instructions for annotating your data can also be found in the Swate Quickstart and in the Swate Manual (Filling cells with ontology terms).