Home
Fundamentals
Research Data Management
FAIR Data Principles
Metadata
Ontologies
Data Sharing
Data Publications
Data Management Plan
Version Control & Git
Public Data Repositories
Persistent Identifiers
Electronic Lab Notebooks (ELN)
DataPLANT Implementations
Annotated Research Context
ARC specification
ARC Commander
Swate
MetadataQuiz
DataHUB
DataPLAN
Ontology Service Landscape
Manuals
ARC Commander
Setup
Git Installation
ARC Commander Installation
Windows
MacOS
Linux
ARC Commander DataHUB Access
Before we start
Central Functions
Initialize
Clone
Connect
Synchronize
Configure
Branch
ISA Metadata Functions
ISA Metadata
Investigation
Study
Assay
Update
Export
ARCitect
Installation - Windows
Installation - macOS
Installation - Linux
QuickStart
QuickStart - Videos
ARCmanager
What is the ARCmanager?
Connect to your DataHUB
View your ARCs
Create new ARCs
Add new studies and assays
Upload files
Add metadata to your ARCs
Swate
QuickStart
QuickStart - Videos
Annotation tables
Building blocks
Building Block Types
Adding a Building Block
Filling cells with ontology terms
Advanced Term Search
File Picker
Templates
Contribute Templates
ISA-JSON
DataHUB
Overview
User Settings
Generate a Personal Access Token (PAT)
Projects Panel
ARC Panel
Forks
Working with files
ARC Settings
ARC Wiki
Groups Panel
Create a new user group
CQC Pipelines & validation
Find and use ARC validation packages
Data publications
Passing Continuous Quality Control
Submitting ARCs with ARChigator
Track publication status
Use your DOIs
Guides
ARC User Journey
Create your ARC
ARCitect QuickStart
ARCitect QuickStart - Videos
ARC Commander QuickStart
ARC Commander QuickStart (Experts)
Annotate Data in your ARC
Annotation Principles
ISA File Types
Best Practices For Data Annotation
Swate QuickStart
Swate QuickStart - Videos
Swate Walk-through
Share your ARC
Register at the DataHUB
DataPLANT account
Invite collaborators to your ARC
Sharing ARCs via the DataHUB
Adding a LICENSE to your ARC
Work with your ARC
Using ARCs with Galaxy
Computational Workflows
CWL Introduction
CWL runner installation
CWL Examples
CWL Metadata
Recommended ARC practices
Syncing recommendation
Keep files from syncing to the DataHUB
Managing ARCs across locations
Working with large data files
Adding external data to the ARC
ARCs in Enabling Platforms
Publication to ARC
Working with branches
Troubleshooting
Git Troubleshooting & Tips
Contribute
Swate Templates
Knowledge Base
Teaching Materials
Events 2023
Nov: CEPLAS PhD Module
Oct: CSCS CEPLAS Start Your ARC
Sept: MibiNet CEPLAS Start Your ARC
July: RPTU Summer School on RDM
July: Data Steward Circle
May: CEPLAS Start Your ARC Series
Start Your ARC Series - Videos
Events 2024
TRR175 Becoming FAIR
CEPLAS ARC Trainings – Spring 2024
MibiNet CEPLAS DataPLANT Tool-Workshops
TRR175 Tutzing Retreat
Frequently Asked Questions
last updated at 2024-01-25
The DataHUB allows you to share your ARCs with registered lab or project partners. After registration, you need to setup the ARC Commander for smooth ARC synchronization between your computer and the DataHUB.
💡 This needs to be done only once per computer.
Enable Git to store credentials on your computer
Open a command prompt or terminal and execute the following command(s)
Windows / Linux
git config --global credential.helper store
MacOS
git config --global credential.helper osxkeychain
Receive and store a DataHUB temporary (2 hour) access token
arc remote accesstoken get -s https://git.nfdi4plants.org
A browser window will open asking for your DataPLANT login. After login you are asked to authorize your computer to communicate with the DataHUB.
In case you are already logged in, the browser will directly display a plain Success message to you.
💡 This authenticates your computer to communicate with your personal DataHUB account
💡 After two hours you have to repeat this process as this token will expire. Have a look at the next section to learn how to create a longer lasting token.
Create and store a configurable DataHUB access token for your project
Access tokens created with the ARCommander expire after two hours. To create a longer-lasting access token for your project, follow these steps:
In your browser, visit your ARC in the DataHub instance of your choice, e.g.:
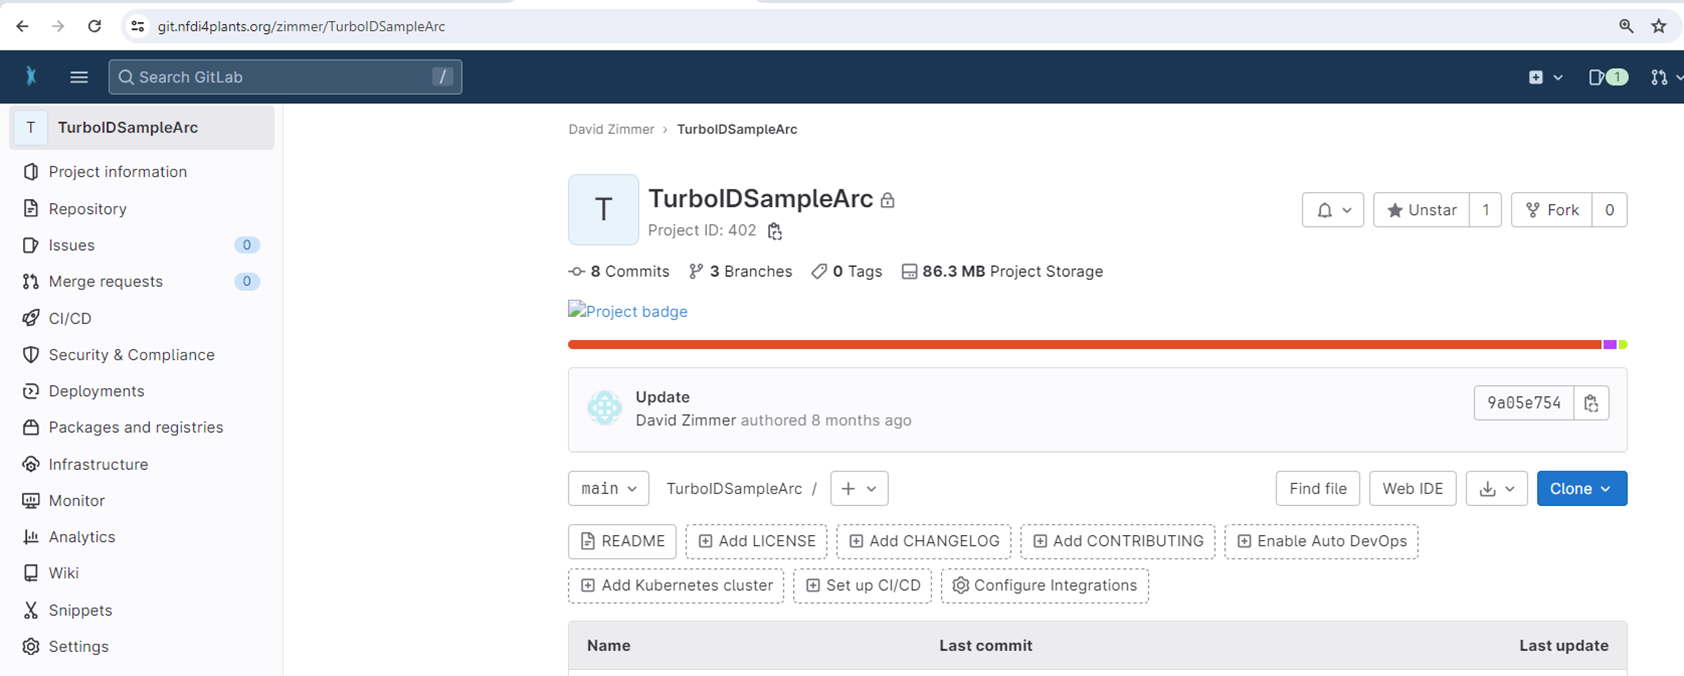
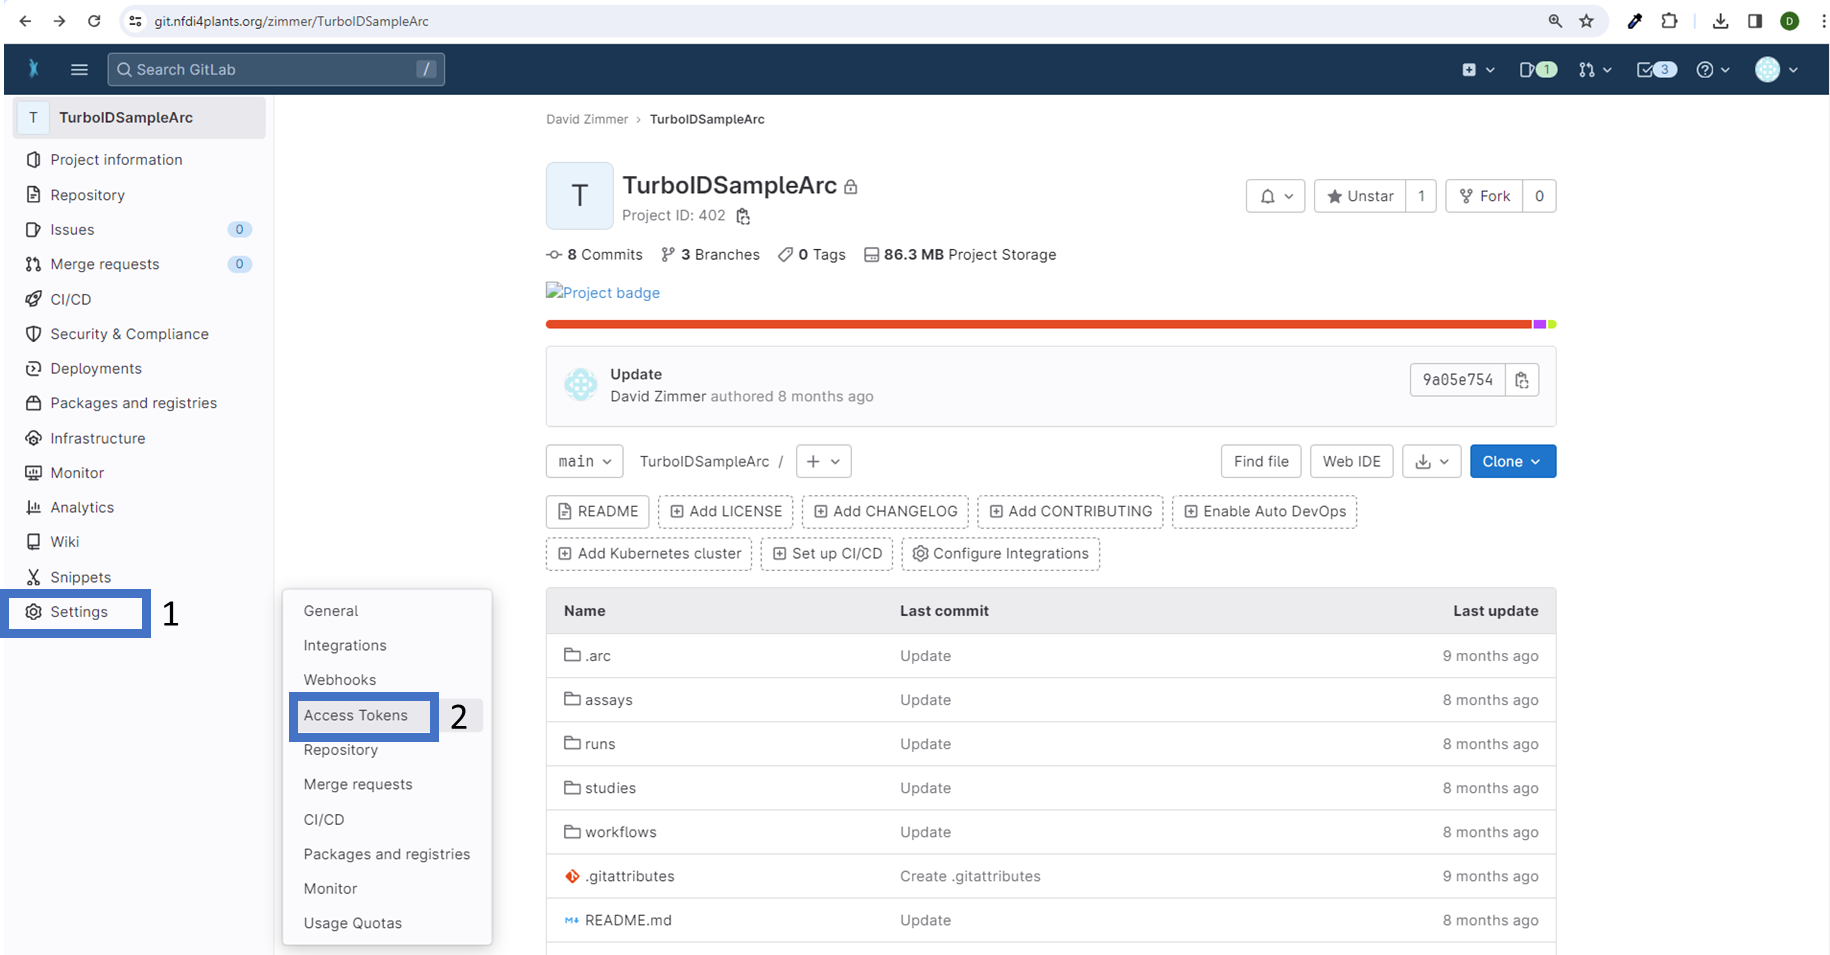
Select 'Settings' (1), then 'Access Tokens' (2):
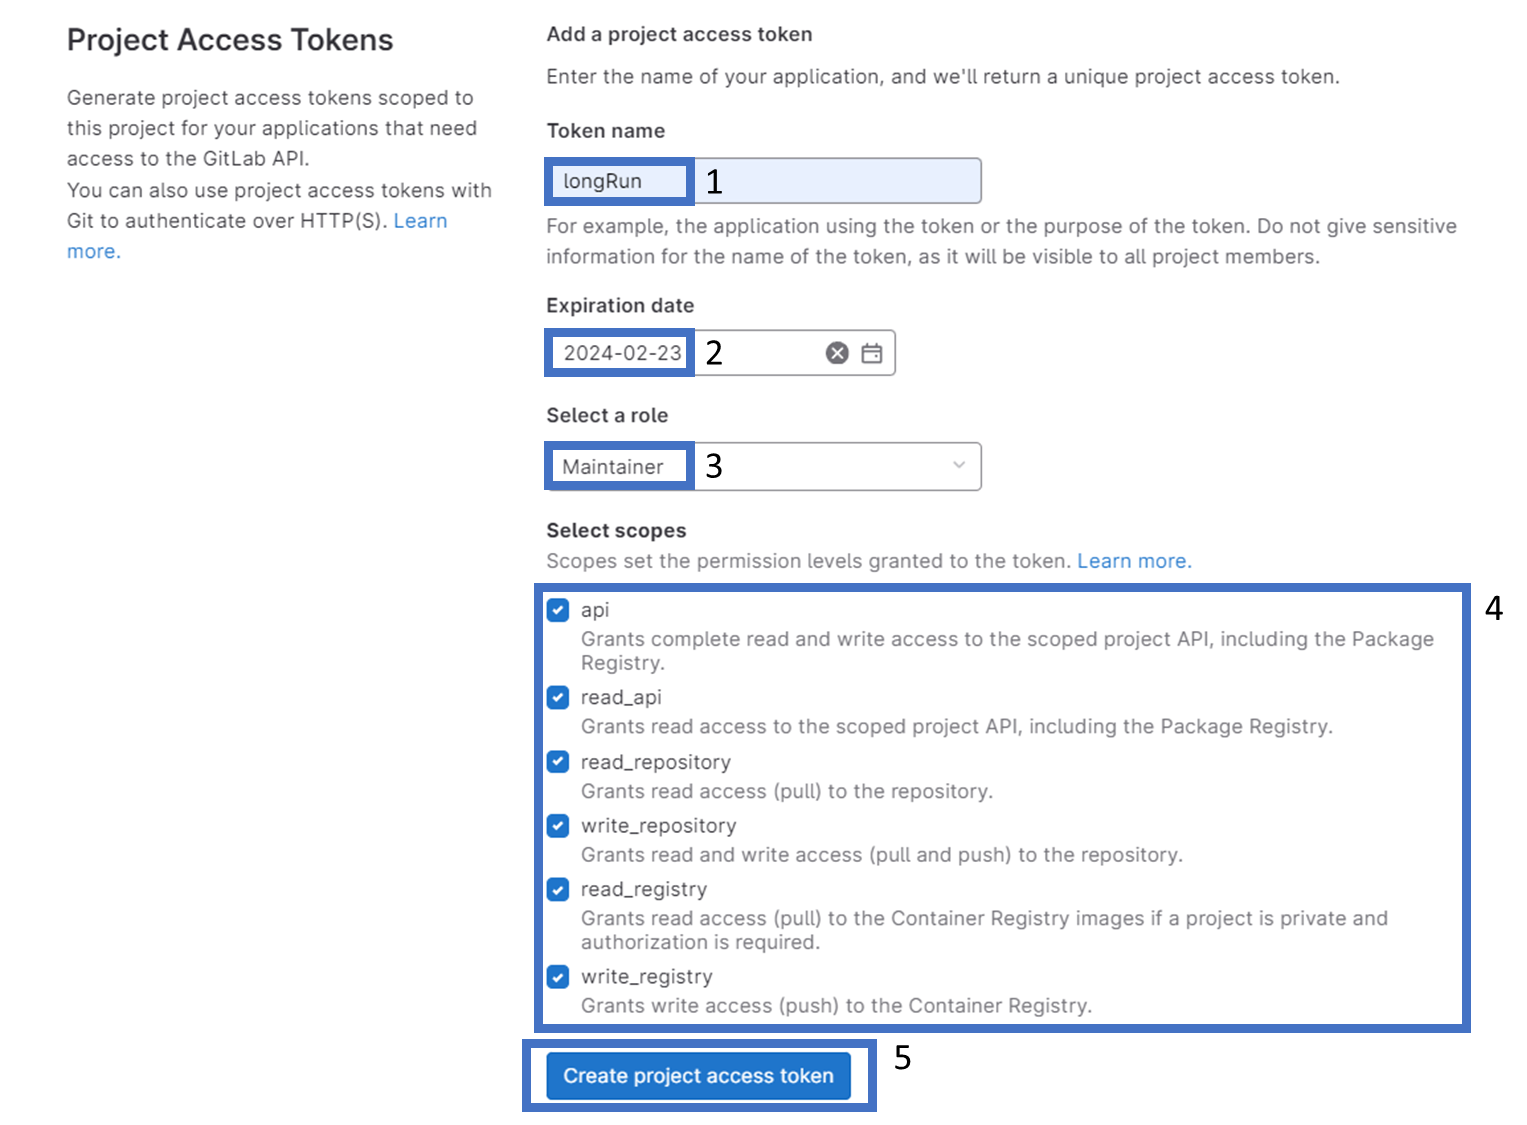
Choose a name for your token (1), set an expiration date (2), assign a role (3), configure permissions (4), and create your token (5):
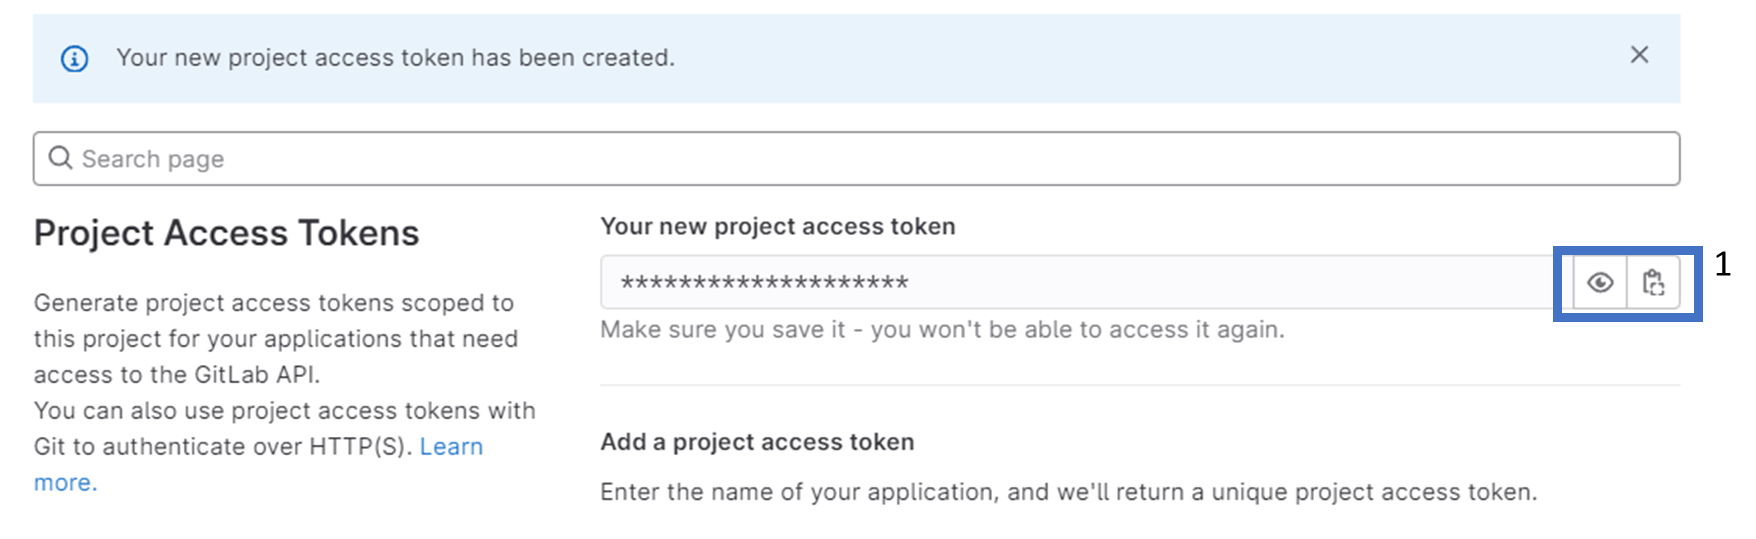
Once created, you can copy the token:
Finally, save the token by opening a command-line interface and navigating to the root of your project. Then, execute to save your token locally:
arc remoteaccess accesstoken store --token <replaceWithYourToken>
Once set up, you will not need to authenticate yourself (e.g., by manually retrieving a token through 'arc remote token get') until the token expires. When switching to another machine you have to repeat the process.